Full Body Workout Plan
- Rafid Nassir

- Apr 17, 2022
- 25 min read
Updated: Apr 18, 2022
I present to you, my full body workout plan, within a 3 day gym schedule. Below, you'll find all the info you need to make decent gains in the gym.

What’s covered?
The most daunting thoughts when committing to a gym routine are usually:
What actual exercises do I do?
Am I doing those exercises correctly? (Don’t want to look like a fool in the gym)
How heavy should I make the weights?
How many repetitions should I do before I stop?
How should I group the set of exercises, on what days?
How many days until I do the same group of exercises again?
How long will it take before I can start seeing results? I need to know this works.
All of the above questions will be answered for you within this article. Make sure you read, and perhaps re-read, through all of this very carefully.
If you have any queries on any of the below, feel free to send an enquiry through our contact form, and I'll be happy to clarify things for you.
Some of the exercises below have videos to annotate and explain the movement in more depth. I'm going to upload more and more of these videos in the future.
What’s unique about this plan? The principles (READ THOROUGHLY)
My aim with working out has always been to spend as little time and mental energy on it as possible, while reaping maximal gains.
You don’t need to be going gym 5 days a week, hours at a time.
You can do this and have a social life, a partner/family you spend quality time with, a highly demanding career.
It’s not just the time spent working out. It’s the mental capacity you need to dedicate to researching what’s effective.
…Well, you don’t need to worry about this, because I’ve done it for you.
After seriously working out for around 8 years (learning a bunch of things on the way), I’ve incorporated 4 main staples I do in combination when possible, that the vast majority of others don’t do.
These are people who have been working out for far longer than me, started off bigger and more defined than me, but I have quickly overtaken.
Those 4 staples apply to every exercise I do, whenever physically possible.
These are:
Fast contraction, slow relaxion
Your form is incredibly important. You don’t want to swing weights around and let momentum move you more than you’re moving the weights.
In order to make your muscles take maximum strain from the weights you’re moving, what you need to do is pretty straight forward:
Contract fast and explosively.
Hold/squeeze at the top.
Slowly relax the muscle until you reach maximum extension.
No dilly-dallying. No mini rests. Repeat immediately.
Combining this with the maximum range of movement that your joints can comfortably provide will allow you to make most use of this staple.
Drop sets
You have 2 types of muscle fibres in each muscle group. Slow and fast-twitch fibres.
Fast-twitch fibres are good for explosive & powerful movement. Slow-twitch fibres are good for endurance and repetitive movement.
Some muscle groups have more fast-twitch than slow and vice versa, depending on what function they serve with your general mobility as a human.
…but ultimately, all muscles have a combination of both types of fibre.
Doing heavy weights with low repetitions hits the fast twitch more. Lower weights with higher reps hit the slow twitch more.
Usually people focus on one or the other when they hit the gym.
What’s helped me get maximum gains very quickly is with drop-setting, I’ve been able to hit and push both of those fibres within the same exercise.
Here’s how I structure my drop sets… and this will take some weight calibration when you first get started:
Select the heaviest weight you can do, where you cannot physically do any more than 5 - 6 repetitions of. If you can only do 4 reps or lower, then it’s too heavy. If 6 or more reps, too light. Same thing also applies for the below rep ranges. (MOSTLY FAST-TWITCH MUSCLE ENGAGEMENT)
Drop the weight by 20%, shake it out and rest for no more than 10 seconds, and do it all over again Your rep range here should be between 5 – 7
Drop by another 20%, straight in again after a 10 second shake-out. Rep range should be 5 – 7.
With the next and final drop (of another 20%), you should be able to do 8 or more reps. (MOSTLY SLOW-TWITCH MUSCLE ENGAGEMENT)
Do each drop with 3 negative reps at the end, where possible. You’ll find out more about Negatives below.
Reps until failure
A lot of people have a number of reps they want to do in mind. They stop once they reach 8, or 12.
This is one of the main reasons why some people, who have been going gym for so long, DO NOT GROW!
Your muscles start micro-tearing (what needs to happen for hypertrophy/muscle growth) once the reps start getting difficult, and you start reaching failure.
The way I best like to explain this is using the barrier analogy. You have 2 barriers whilst you’re doing reps:
The Pain Barrier
This is the one to power through and overcome. The lactic acid is building, burning, intensifying with every rep.
The classic “burn” pain is kicking in, it gets intense and is what separates the men from the boys. The average Joe from the elite athlete.
It really depends on both your pain tolerance and mental resolve, but you basically need to consider that burning pain as non-harmful and just push through.
Don’t worry, you won’t die.
The Fatigue Barrier
The barrier you want to reach, and the satisfaction you get is great every time.
If you’ve selected the right weight and have powered through that pain barrier, you’ll have eventually done so many reps that you cannot physically do another one, even if your life depended on it.
That’s when you know you have maximally micro-teared and pushed your muscle to the absolute limit.
You’ll know you’ve done it right when you feel it in the morning. In fact, you’ll likely feel it for the next 3 – 4 days.
Negative reps
These are beautiful yet won’t be possible to apply to every single exercise you do.
To put it simply, once you reach the fatigue barrier and can’t contract/push/pull anymore, you want to:
Find a way to have something/someone assist you to full contraction
Let the fatigued muscle hold the weight up for as long as you can
…it won’t last long as gravity will inevitably pull the weight to full extension (make sure you fight gravity. FIGHT IT.)
I’ll give you an example of this. Let’s say you’re doing bicep curls with your right arm.
Once you’ve done the max amount you can do and have reached the fatigue barrier (see barrier analogy above), take your left hand and use it to lift your right contracting arm all the way up.
Let your right arm go and whilst it still holds the weight, do your best to fight gravity’s inevitable pull, down to max extension.
Splitting the days
I’ve always kept the same day splits since I started working out, and it’s worked wonders for me.
This split is optimal for:
Perfectly timed recovery between workouts
Minimal overlap of muscle fatigue between the days
Maximal fatigue focused on the muscle groups being worked on the day
It’s a sort of spin on Push/Pull/Legs.
Remember to apply the above 4 theories to ALL the below workouts, doing 3 negatives at the end of each set, where possible.
Day 1: Chest & triceps
On this day I do 3 different compound (hitting more than 1 muscle group in one exercise) exercises, followed by 2 isolations. One to isolate the chest, and one for the triceps.
There are 5 exercises in total. Approximately 1hr. Nice and quick.
Dumbbell Chest Press (Flat Bench) – Compound 1/3:
***VERY IMPORTANT: You want to make sure you mount the dumbbells properly.
The same mounting technique applies to all Dumbbell press exercises on a bench, and here’s a link to my video explaining how it’s done.
This exercise is crucial for a big chest, far safer and (in my opinion) more effective than the traditional barbell bench press, as you have the advantage of range of movement with no restriction on grip angles.
Starting position:
Your elbows need to be tucked in.
1cm max away from your chest. You want full range of movement.
Both dumbbells must be in line with your nipples.
An arch in your lower back, lifting slightly off bench is fine
Feet must be grounded

Contraction:
Upwards movement must be as quick and explosive as possible
Dumbbells all the way up, but not touching/clashing in the middle
It’s OK for hands to turn inwards slightly, so your fists are in line (like you’re holding a straight bar
Elbows pointing outwards slightly

Relaxation:
Do NOT hold dumbbells at the top. Start going straight down as soon as dumbbells hit their peak extension.
Make sure dumbbells are lowered very, slowly. Count 4 seconds as you lower dumbbells if that helps
Go all the way back down to chest level (basically touching your chest).
Straight back up to contraction.
Incline Dumbbell Chest Press (Reverse Grip) – Compound 2/3:
Make sure you rest for at least 5 minutes after doing the previous flat bench exercise.
Angle the back of the bench at slightly above (flatter than) 45° (see picture below), with the seat of the bench upwards slightly, to support your butt from slipping down.
Mounting the dumbbells here will be similar to the previous exercise, but with your knuckles facing down – this will help to isolate the upper part of your chest.
Here’s a video of me demonstrating this exercise.
Starting position:
Make sure you grip both dumbbells so that your fingers and thumb are facing upwards, and knuckles are downwards.
Your elbows need to be tucked in.
1cm max away from your body, in line with the bottom of your rib cage.
Like the last exercise, slightly arching your back again here is OK
Feet must be grounded either on the floor, or on the footrest on the bench if there is one available.

Contraction:
Quick and explosive upwards movement
Pushing the dumbbells upwards makes them go from being in line with bottom of rib cage, to mid shoulders.
No need to lock your arms out completely at the peak of contraction if not comfortable to do so but try and get as close as possible.

Relaxation:
Do NOT hold dumbbells at the top. Start going straight down as soon as dumbbells hit their peak extension.
Make sure dumbbells are lowered very, slowly. Count 4 seconds as you lower dumbbells if that helps
Go all the way back down to body level (touching your lower ribcage).
Straight back up to contraction.
Dips – Compound 3/3:
If you can do body weight dips, great. If you can do weighted, even better. But if you are just starting out and can’t do more that 4 reps with body weight only, then make sure you use the dip machine with the platform at the bottom, which can assist you with however much weight you’d like it to push upwards for you.
If you can do more than 8 reps of your bodyweight, I’d recommend buying this dipping belt (it’s the one I have), and attach some extra plates.
If your dipping frame allows it, push the handles outwards to a wide grip dip position.
Starting position:
Hold the handle on the side closest to you (the tip), to give you room to lean forward when dipping.
Your elbows need to be tucked in.
At starting position, your upper arms (humerus bone) must be parallel to the ground
The angle in your inner elbow should be as small as possible. 45° is OK, but if you can make the angle smaller than that’s even better.
Feet mustn’t be touching the floor, and don’t jump off the floor (just yet).

Contraction:
Quick and explosive upwards movement
Legs should come forward with head and neck going backwards, putting you in an almost vertical position.
At the peak of contraction, you want to push yourself as far away from the handles as possible. Elbows almost locked.

Relaxation:
Do NOT hold at the top. Start going straight down as soon as you’re at peak height.
Make sure you lower yourself very, slowly. Count 4 seconds as you go down to the lowest position possible.
Go all the way back down to the angles you had at starting position.
Straight back up to contraction.
Cable Chest Fly – Isolation 1/2:
Machine with cables on either side would be ideal for this exercise, but alternatively you can use the pec-fly machine (which can also turn into rear delt-fly machine).
These instructions will be for the cable-fly as it needs really good form in order to make full use of it.
Put the notched on either side as high as you possibly can. And clip on the single handle extension on both cables.
Starting position:
Hold both handles and place yourself precisely in between both cables.
Take one step forward (like a lunge) and keep the front foot there, so you have one foot forward, and one foot back.
Lean forward
In this position, you should feel a slight stretch of your pecs at full extension.
Keep your arms as straight as possible with a slight bend at the elbows.

Contraction:
Bring arms together and diagonally down.
Gradually lean slightly back, keeping feet in place.
Peak contraction should allow the arms to cross in line with your mid torso.
Take turns as to which hand/arm crosses above the other with every rep.
When you reach peak contraction, hold position and squeeze for 2 seconds.

Relaxation:
Relax your arms back up very, slowly. Count 4 seconds as you go back to starting position
Lean forward again as your arms relax upward.
Keep feet grounded the entire time.
You should be able to feel that stretch every time you fully relax into starting position
Tricep Extension – Isolation 2/2:
This machine can be a bit annoying if yours doesn’t have a pad to support your back (most don’t).
So if that’s the case and if you’re using heavier weights you’re going to need to stand behind the seat. Reason being, it’ll be too demanding for your abs to keep you in place and you want to keep the energy exclusively focused on your triceps as much as possible.
Here’s a video of me demonstrating this exercise.
Starting position:
Bring your upper body as close as possible to the handles, with your elbows bent back as far as possible.
Keep your elbows down on the pad.
Your triceps in this position should feel a slight stretch.

Contraction:
Keeping elbows on the pad, extend arms all the way down.
Keep feet firmly in place, leaning forward into the push.
Upon peak contraction, hold position and squeeze for 1-2 seconds.

Relaxation:
Relax your arms back up very, slowly. Count 4 seconds as you go back to starting position
Lean forward again as your arms relax upward.
Keep feet grounded the entire time.
You should be able to feel that stretch every time you fully relax into starting position.
Day 2: Legs, lower back & abs
There’s only one compound (for power & multiple muscle group co-ordination) in this session and because there are so many different muscle groups involved, the rest are all isolation.
8 exercises in total. Approximately 1hr 30min.
Leg Press (Hack Squat) Machine – Compound 1/1:
You want to focus a bit more on your glutes and hamstrings with this compound. For that, you’re going to need to place your feet as highly as possible on the pad you push with your feet.
To set up, put your seat as close as possible to the pad so you’re in a tight squatting position.
When you get to your final reps and start reaching failure, you can use your hands to push your knees forward, assisting your legs with the press.
Here’s a video of me demonstrating this exercise.
Starting position:
Put your feet parallel to each other, at about two feet apart (in line with the outside of your hips).
Make sure feet are placed as high up on the pad as possible.

Contraction:
Make sure arms are out of the way, but are in a comfortable position (I usually fold across my chest like in above image)
Push all the way up but DO NOT LOCK YOUR KNEES! Always leave a slight bend.

Relaxation:
No delay.
Let your legs go all the way back to starting position without letting knees point outwards.
Calf Press Machine – Isolation 1/7:
Position the seat/machine close enough so that your ankles are bent as far back as possible. You want to also have a slight bend in the knee for a better angle.
Do not move your knees during the exercise. Your ankles should be the only things moving while doing this.
You won’t believe the amount of times I’ve seen people use this machine to do leg press. It’s supposed to be for your calves only.
Here’s a video of me demonstrating this exercise.
Starting position:
Place the balls of your feet on the pad
Make sure your feet are straight, parallel with each other.
Your feet should be perfectly aligned with your hips
Before you start, you should have a slight bend in the knees, and ankles fully extended back as far as possible.

Contraction:
Keep knees frozen in place.
Extend your ankles as far as possible (like you’re tip-toeing).
When you reach peak extension, hold and squeeze for 2 seconds.

Relaxation:
When you release, do not flop straight back down.
Count 4 seconds as you go back to starting position.
Keep knees in the same place with that slight bend
Quad Extension Machine – Isolation 2/7:
This one gives me the biggest burn, and is the best example of how to fight the pain barrier.
Make sure the seat is positioned so that the inside of your knee is just in front of the edge, but not directly on it.
Too far forwards and you’ll put too much pressure on your femur. Directly putting the bend of your inner knees on the edge could be troublesome for your joints.
Here’s a video of me demonstrating this exercise.
Starting position:
Slot your legs inside and adjust the machine so that your feet are pushed to the furthest back level.
Place your feet parallel with your hips, and keep both feet straight
Firmly grip the handles on the side

Contraction:
Fast & explosive contraction to the top.
When your legs cannot go any higher, hold position and squeeze for 2 seconds.

Relaxation:
After you squeeze, relax slowly. Count 4 seconds as you go back to starting position
When you reach starting position again, go straight back up. No delay.
Hip Adduction Machine – Isolation 3/7:
Try and set the pads as wide as you can possible spread your legs apart. The greater the range of movement with this one, the better.
You may feel a click in the middle of your pelvis (crotch area) on the first rep. That’s totally normal. Happens to me and a few others I know.
Here’s a video of me demonstrating this exercise.
Starting position
See picture below. This is a pretty easy machine that will slot you into position nicely.
As mentioned above, just make sure the pads are as far apart as possible.

Contraction:
Squeeze all the way in, so the pads touch each other.
Squeeze and hold for about 2 seconds

Relaxation:
Release the squeeze gradually. Count 4 seconds as you go back to starting position.
You should be able to feel a nice stretch every time you fully relax into starting position
When you reach failure, you can set up your own negative reps by pushing your legs together with your hands, and then relaxing back to starting position again x 3.
Hip Abduction Machine – Isolation 4/7:
Most machines aren’t quite calibrated properly for the right abduction movement.
So usually if you just follow the instructions on the machine, it won’t hit the muscle as well as it should in my approach below.
Starting position:
Reach out to the main frame, and hold both sides with your arms straight.
As you reach forward, your bum will come up. As that happens, make sure your centre of gravity stays in the same place.

Contraction:
Keep your bum in the same place as you start to push your legs outwards.
Push out to the very limit of your flexibility
Hold at peak contraction for about 2 seconds.

Relaxation:
Still keeping your bum in the same position, count 4 seconds as you go back to starting position
Keep feet grounded the entire time.
Hamstring Curl Machine – Isolation 5/7:
Sit back as far as you can so your bum is in the corner of the seat.
Make sure the clamping pad is as low down on your quads as possible, to constrict movement as much as possible.
The pad you curl down should be at the very bottom of your calves.
Starting position:
Make sure the notch setting straightens your leg out as much as possible.
You should feel a nice stretch in your hamstrings

Contraction:
Make sure your feet stay straight and keep pointing upwards throughout the movement.
Try not to engage your calves, and keep the contraction focused only on your hamstrings.
When you reach full contraction, squeeze for a good 2 – 3 seconds.

Relaxation:
Relax your legs back up very, slowly. Count 4 seconds as you go back to starting position
Still keeping the power coming from your hamstrings only. Not your calves.
Lower Back Extension – Isolation 6/7:
Most people don’t realise this machine has a seat-belt to keep you in place as you push upwards.
Make sure that seat belt is locked tight so you can really concentrate the contraction on your lower back.
If you feel you’re having to use your quads to help stabilise and keep you in place, then it’s not tight enough.
The pad you push back should be under your lower traps, just above your shoulder blades. The notch on the pad should also push you as far forwards as possible. Greater range of movement.
Foot pedal should be high enough for you to have a comfortable bend of the knees.
Starting position:
Place your hands on your chest as shown in image below, so you avoid them getting in the way.
Make sure your entire back is straight and are facing forwards

Contraction:
Take your time pushing your body all the way back – no need for explosive movement here.
Ensure your back and neck stay straight at all times.
Keep pushing until your body is as vertical as possible.
Hold that max extension for a good 2 seconds or so.

Relaxation:
Relax back down very slowly. Count 4 seconds as you go back to starting position
After a few reps, once you reach failure, you can use your arms to push off your knees and bring you back to a vertical position. Relax from there after failure 3x.
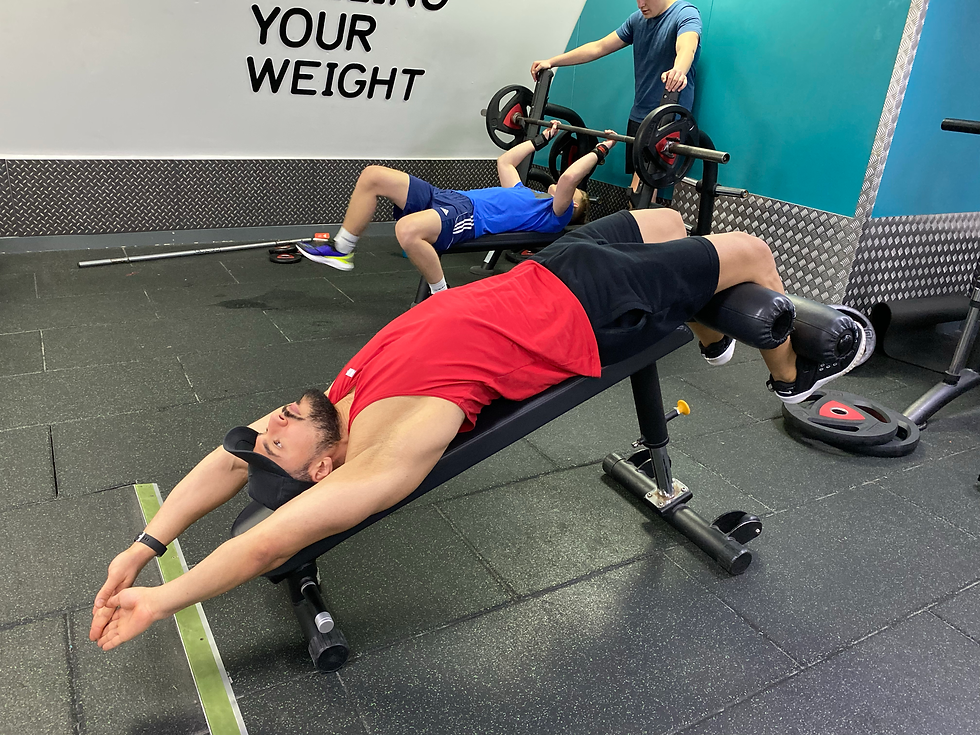
Express Ab Exercise – Isolation 7/7:
You could even do this on flat ground, which would be almost as effective (as long as your feet are anchored to the floor) but the optimal way to do this is on a decline bench.
There are 4 different levels of intensity (for the drop-sets), which will need 4 different positions for your arms to be in.
This basically shifts your centre of gravity from being far from the fulcrum/your hips (highest intensity), to being closer where the intensity reduces the nearer your centre of gravity is to your hips. Physics 101.
Each of the 4 levels can be seen in pictures below. Do as many as you can of each one, before you move onto the image below.
Starting position 1:
Imitate the image below, make sure you have a slight arch in your back.
You should feel a stretch along your abs, right down to your pelvis.
Contraction:
Keep your arms together and straight, in line with your back.
Do NOT let yourself fold at the lower ribs. Keep the fulcrum at hip level.
Come up as high as you can, as close to a 90º angle from the floor as possible.
The moment you can’t even go past around 45º, move to the next position…
Relaxation:
Keeping your back straight, you should have a slight arch in your lower back
Lower your body down, leading with your shoulder blades. Go down SLOWLY.
When you reach full relaxion, your shoulder blades (or upper back) should be the first to touch the bench
If you’re rolling your lower back on the bench on the way down, you’re doing it WRONG.
Starting position 2:
Lay back down after failing the last rep in your previous position.
Immediately place your fingers on your temples and keep your back the same as last position
Do not wait any longer than two seconds between failing last rep of position 1, switching to and doing your first rep of position 2.

Contraction:
Keep your fingers on temples the whole time, and keep back straight.
Do NOT let yourself fold at the lower ribs. Keep the fulcrum at hip level.
Come up as high as you can, as close to a 90º angle from the floor as possible.
The moment you can’t even go past around 45º, move to the next position…
Relaxation:
Keeping your back straight, you should have a slight arch in your lower back
Lower your body down, leading with your shoulder blades. Go down SLOWLY.
When you reach full relaxion, your shoulder blades (or upper back) should be the first to touch the bench
If you’re rolling your lower back on the bench on the way down, you’re doing it WRONG.
Starting position 3:
Lay back down after failing the last rep in your previous position.
Immediately cross arms over, placing palms of hands on upper outer sides of chest.
Keep your back the same as last position
Do not wait any longer than two seconds between failing last rep of position 2, switching to and doing your first rep of position 3.

Contraction:
Keep your hands on chest the whole time, with back straight and leading with elbows.
Do NOT let yourself fold at the lower ribs. Keep the fulcrum at hip level.
Come up as high as you can, as close to a 90º angle from the floor as possible.
The moment you can’t even go past around 45º, move to the next position…
Relaxation:
Keeping your back straight, you should have a slight arch in your lower back
Lower your body down, leading with your shoulder blades. Go down SLOWLY.
When you reach full relaxion, your shoulder blades (or upper back) should be the first to touch the bench
If you’re rolling your lower back on the bench on the way down, you’re doing it WRONG.
Starting position 4:
Lay back down after failing the last rep in your previous position.
Immediately extend arms straight, either side of you, keeping arms parallel with the floor.
Keep your back the same as last position
Do not wait any longer than two seconds between failing last rep of position 3, switching to and doing your first rep of position 4.

Contraction:
Keep your arms straight and pointing forward the whole time.
Do NOT let yourself fold at the lower ribs. Keep the fulcrum at hip level.
Come up as high as you can, as close to a 90º angle from the floor as possible.
The moment you can’t even go past around 45º, move to the next position…
Relaxation:
Keeping your back straight, you should have a slight arch in your lower back
Lower your body down, leading with your shoulder blades. Go down SLOWLY.
When you reach full relaxion, your shoulder blades (or upper back) should be the first to touch the bench
If you’re rolling your lower back on the bench on the way down, you’re doing it WRONG.
Day 3: Biceps, shoulders & back
Try not to do this workout the day after Chest & Triceps (day 1), as there is some overlap with the shoulders and upper chest getting involved.
There’s an even combination of compound and isolation exercises on this day, so it’s a great all-rounder.
8 exercises in total. Approximately 1hr 30min.
Dumbbell Shoulder Press – Compound 1/4:
Similar to the DB chest press, PLEASE make sure you mount the dumbbells correctly. I don’t want any unnecessary injuries!
Here’s the video again for how you mount dumbbells for the chest press, it’s really similar to this; the only difference being you don’t lay all the way back.
You just have to drive the dumbbells all the way up to shoulder level with your knees, then start the lift from there.
And here’s another video of me doing the entire exercise from start to finish, with the heaviest and first of the drop set, to the lightest and last level.
Starting position:
Ensure the back of the bench is vertical, and the seat is flat horizontal, forming a 90º angle for your seated position.
Once you have kneed the dumbbells to shoulder level, either point elbows diagonally outwards in front of your body, or parallel and straight with your body. Whatever feels more comfortable.
Your upper back and lowest part of your back (tailbone) will be in constant contact with the bench .
Push upper back against the bench & chin down.
Ground feet to the floor.

Contraction (Push):
Leading with your elbows directly upwards, push dumbbells vertically upwards.
With your feet rooted to the floor, the push through your legs should keep you in place nicely.
Peak push/contraction should have dumbbells just about aligned with the outside of shoulders.
Do not let arms/dumbbells come any closer together. This would do nothing but increase chance of injury.
When you reach peak contraction, hold position and squeeze for 2 seconds.

Relaxation:
Leading with your elbows again, lower arms down very slowly.
Bring dumbbells slightly out (away from your body) as you lower them.
Elbows should form at least a 90º angle at lowest point (max relaxion).
Don’t linger at max relaxion for too long – get the next rep!
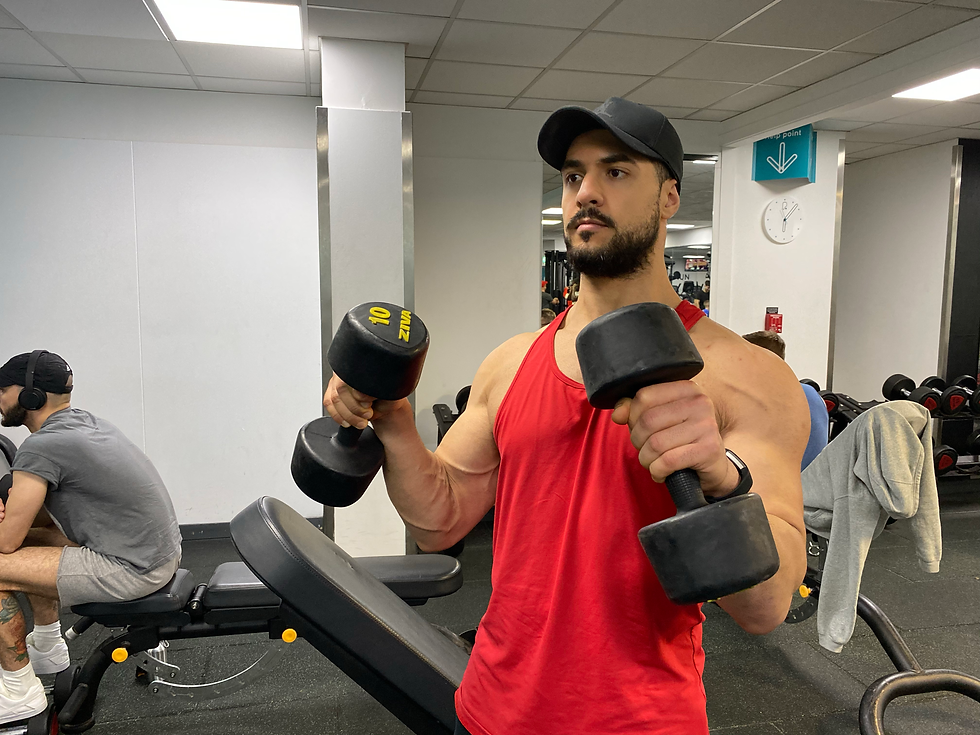
Dumbbell Bicep Concentration Curl – Isolation 1/4:
This one’s quite juicy and will make you sweat. One of my faves for sure.
You’ll be doing reps ‘till failure and then 3 negative reps each set of every drop.
Read this very carefully.
Have your 3 different dumbbells at the ready (the max, middle & lightest weight).
Find a sturdy seat, preferably a bench.
You want to:
Use the max weight dumbbell on one arm
Rep until failure
Use your other hand to lift the weight back up (essentially using both hands), so you can get the negative rep x 3
Switch to the second arm straight away
Rep until failure
Use your other hand to lift the weight back up (essentially using both hands), so you can get the negative rep x 3
Lift the next (middle) weight with your first arm
Rep until failure
Use your other hand to lift the weight back up (essentially using both hands), so you can get the negative rep x 3
Switch to the second arm straight away
…and so on, until you do both arms with the max weight
Starting position:
Hold your dumbbell with lifting arm
Place elbow on inside of leg, with the elbow in contact with the middle of your upper leg
Make sure your arm is as straight and extended as possible
Lean slightly towards the leg that the lifting arm is on
Use your other supporting arm to push off your other leg, for stability.

Contraction:
Twist wrist to ensure the back of your hand is directly facing the floor, and dumbbell is flat facing up.
As you lift the weight up, it’s more effective to let your wrist slightly bend backwards.
As the weight goes up, lean slightly forwards, away from your leg, and closer to the weight & middle of your body.
Max lift & contraction should have your bicep squeezed fully.
When you reach peak contraction, hold position and squeeze for 2 seconds.

Relaxation:
Relax hand back down slowly, leading the downward movement with your knuckles.
As your hand lowers down, lean slowly back away from it, towards your leg again.
Keep feet grounded the entire time, with supporting hand leaning on your other leg.
You should be able to feel a stretch across your bicep each time you bring your arm back to a straight position and lean back against it.
For negative reps, simply do the same as all the above, but use your other hand to support the upward movement of your lifting hand.
Machine Shoulder Press – Compound 2/4:
As always, remember range of movement is really important. So you need to make sure the seat is adjusted so your grips are exactly at shoulder level
Plant your feet firmly on the ground, pushing your back tight against the seat.
Here’s a video of me demonstrating this exercise.
Starting position:
Hold the vertical grips, so your hands are parallel to and are facing each other.
Make sure you drop your shoulders, tucking your shoulder blades in for correct form
A slight arch in the back is fine, as long as your upper and lower back are in contact with the back of the seat
Elbows should be tucked in and close to the body, pointing down to the floor.

Contraction:
Keep elbows pointing down at the floor.
Burst of movement directly upwards, keeping a mind-muscle connection with your delts & treps.
Even at peak contraction your shoulder blades should remain tucked in.

Relaxation:
Relax your arms back down very, slowly. Count 4 seconds as you go back to starting position
Keep feet grounded, elbows pointing down, & shoulder blades tucked in the entire time.
Seated Row Machine – (Semi) Compound 3/4:
As you have probably already picked up, I’m all about maximum extension & range of movement.
So with this one, I like to make sure the chest support is extended as far out as possible, so I have to really stretch to grab the handles.
You want to make sure there is a natural stretch of the upper back from just holding onto the handles in starting position. That’s how you know you’re about to really hit the muscle!
The seat should be high enough so the top of your chest support is in line with your clavicle.
Starting position:
Hold both handles in a vertical grip.
Arms should be extended forwards enough for you to feel a nice stretch in your lower back.
You may need chalk to keep your grip strong on the handles.
Your chest will be inverted at this point, to accommodate the stretch.

Contraction:
Really focusing on your upper back and lat muscles, pull your arms back as explosively as possible.
Lean head slightly forward, tucking chin in, to prevent neck injury.
Bring your elbows as far back as possible, while keeping them tucked in.
As you pull back, push your chest out as far as possible, attempting bring your shoulder blades together
In the last few reps, as you start reaching failure, the inverting and exverting of your chest will likely be the only movement you can do. Keep doing that until you reach failure with that too.

Relaxation:
Relax your back very slowly, bringing your chest gradually back to an inverted position. Count 4 seconds as you go back to starting position.
Bring arms forward all the way until you hear the clink of the weights connecting again.
Delt Raises (Machine) – Isolation 2/4:
The default position for this machine is a bit weird.
I usually have to bring the seat up as high as possible and scootch forward a little, so the pads align with where my forearms naturally sit.
The above might be different for you, depending on your body shape and machine you’re using. Once you do find a position that you feel best targets your delts, and you start doing the below movement, you’ll find that this is a really good one for holding at the peak and slowly relaxing to starting position.
Starting position:
Keep your back straight, face forward.
Make sure your shoulder blades remain tucked in and pushed towards each other.
Push your chest out, arch your back.
Push your upper back firmly against the back rest.
It’s OK to come forward on the seat a little to help make the angle more comfortable for you.

Contraction:
Keep shoulders down, and shoulder blades locked in place in your back.
Fast contraction until you reach at least a right angle with your arms.
When you reach peak contraction, hold position and squeeze for 2 seconds.

Relaxation:
Relax your arms back down very slowly. Count 4 seconds as you go back to starting position
Lean forward again as your arms relax upward.
Ensure you keep those shoulders down and shoulder blades tucked into your back at all times.
Lat Pulldown – (Semi) Compound 4/4:
This one is a great alternative to the traditional pull up. Especially if you can’t do more than 6 reps with your own bodyweight. Not to mention how much easier it is to drop set with the weight notches.
Because you have a few different muscles that get involved with this movement, it’s important to remember the specific muscle you’re targeting here (the lats), and really focus on using that each time you pull down.
This is what we call the mind-muscle connection.
To set the machine up right, make sure the foam clasp is holding your legs down firmly to the floor, with no leeway for movement, and that you have to really stretch up to grab the handles.
Starting position:
When holding both handles you should feel a nice stretch from where your outer shoulders end, all the way down your lats, to your mid back.
Keep your chin tucked in to prevent neck injury.
Feet flat on the floor, and kept in place by the foam clasp.

Contraction:
Pull arms down in an explosive manner.
Keep chin tucked in and legs planted the whole time.
It’s OK to lean back a little, but not to add to the pull-down momentum. This is purely for angling purposes.
You should have the handles down as low as your flexibility can allow.
Hold in this position for about 2 seconds before repeating.

Relaxation:
Relax your arms back up very, slowly. Count 4 seconds as you go back to starting position
Lean forward again as your arms relax upward.
Keep feet grounded the entire time.
You should be able to feel that stretch every time you fully relax into starting position
Bicep Hammer Curls – Isolation 3/4:
There’s a seated machine (which you may or may not have) that does a pretty decent job of this, but the dumbbells do the trick just as well.
Some people prefer to do one bicep at a time, but because it’s a hammer movement, where you’re not twisting the dumbbell on the way up, you don’t have to worry about knocking into your sides.
The key here is to hold the dumbbells so they’re pointing diagonally inwards, almost like you’re holding the “ten to two” position on the steering wheel of a car.
That way you hit the upper inner forearm, as well as the outer lower bicep. I can’t stress how important this area is to focus on.
Starting position:
Keep arms straight down in front of you, with tops of dumbbells facing diagonally inwards (as explained above).
Lean back a little, so you maximise the extension & straightness of your arms.
Your upper arms (shoulders to elbows) must be tucked into your body, and stuck there LIKE GLUE the entire time for this exercise.
The only part of your arm that should be moving from this position, is the elbow & below.

Contraction:
KEEP the tops of the dumbbells pointing in the same direction.
Pull both dumbbells up at the same time, keeping arms straight in front of you and parallel to each other
Lean forward ever so slightly to angle your body better and help hit the muscle nicer.
It’s fine for the wrist to bend forward slightly as you complete your contraction. This slightly adds to the resistance.
When you reach peak contraction, hold and squeeze for half a second.
Relaxation:
Relax your arms back down very slowly. Count 4 seconds as you go back to starting position
Keep dumbbells pointing inwards. In fact, if you feel you can invert them further on the way down, even better.
Lean back as arms go down, you’ll feel this lengthen the journey you take to full extension.
Arms should feel a nice stretch as you straighten them out.
Rear Delt Flys – Isolation 4/4:
This hits a similar part of your back to the seated rows, but in the way of adduction, so you have a huge advantage with range of movement, allowing you to finely target those back muscles, similarly to how the chest fly finely targets the chest muscles.
Starting position:
Hold both handles with hands as close to each other as possible.
Adjust your seat so your arms are straight in front of you, with hands in line with shoulders.
Keep back straight and chin tucked in.
Do not hunch your back. Make sure your shoulder blades stay down and in place.
Keep your arms as straight as possible and feet planted at all times.

Contraction:
Contraction is pretty straight forward as your whole body remains still, apart from the adduction movement with your arms.
Pull arms back as far as possible - you should feel your shoulder blades pressing on each other at the end.
When you reach peak contraction, hold position and squeeze for 2 seconds.

Relaxation:
Bring your arms back to centre slowly. Count 4 seconds as you go back to starting position.
Try not to let the weight plates slam, but make sure they touch each time you complete a rep.


Comments